What EPDM does better than anything else
Before I get to the detail, let me explain why I still spec EPDM on low-slope roofs, even with the installation challenges.
EPDM is a synthetic rubber membrane. It's been used for commercial roofing since the 1960s. The formulation varies by manufacturer, but the core properties are consistent across the industry:
UV resistance: EPDM contains carbon black, which blocks UV radiation. It doesn't degrade in sunlight the way asphalt shingles do. I've seen 20-year-old EPDM roofs that were still flexible and intact on the exposed surface.
Ozone resistance: The membrane resists the cracking that ozone causes in other elastomers. In high-ozone environments (Denver has moderate ozone levels), EPDM holds up better than modified bitumen or built-up roofing.
Temperature extremes: EPDM remains flexible at -40°F and stable at 200°F. In Colorado, where winter lows hit -15°F and summer roof surface temperatures exceed 160°F, that's a critical property.
Puncture resistance: A 60-mil or 90-mil EPDM membrane is tough enough to resist foot traffic, hail (up to about 1-inch diameter), and the occasional dropped tool. I've tested this in the field—hail that would tear through asphalt shingles often bounces off EPDM with no visible damage.
Seam strength: The seams in EPDM are fully adhered with a specialized adhesive, creating a continuous, watertight seal. If the seam is done correctly.
Low-slope performance: EPDM is designed for roofs with slopes down to 1/4-inch per foot. It's the most reliable option for low-slope residential roofs in cold climates.
The long view: A well-installed EPDM roof with 90-mil membrane and proper flashing details will last 30-40 years. That's longer than asphalt shingles, longer than modified bitumen, and longer than most metal roofs in Colorado's freeze-thaw environment. It's also lighter than most other low-slope options, which reduces structural loading.
The detail that makes or breaks the roof

Here's the problem: the seams—where two sheets of EPDM meet—are the weakest point. And the most critical detail in that seam is the seam preparation and adhesive application.
I'm not talking about lap width (3 inches minimum, 4-6 inches preferred). I'm not talking about the roller pressure (about 50-75 pounds for initial set). I'm talking about the cleaning and priming of the seam edge.
Here's what I see in the field, over and over:
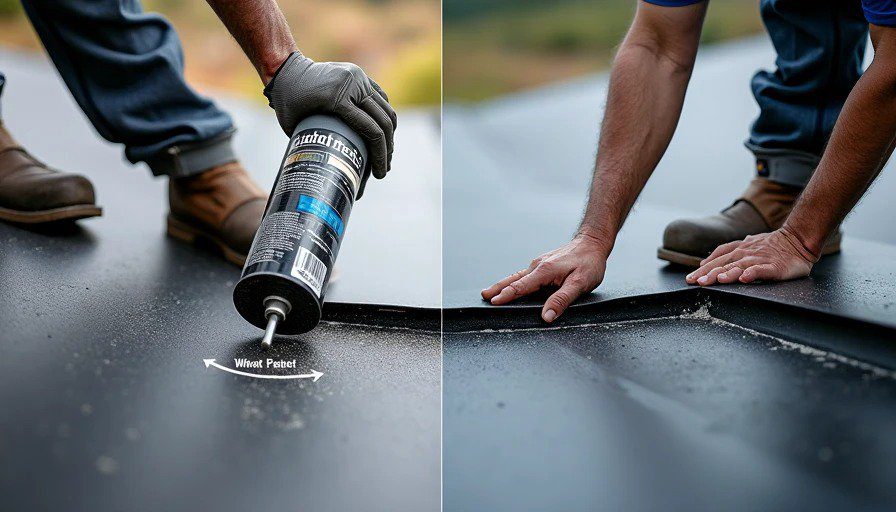
The roofer lays the EPDM membrane, then uses a solvent-based cleaner to wipe the seam edge. The cleaner removes dirt and oils—good.
They apply a layer of seam primer. The primer preps the surface for the adhesive and extends the adhesive's working time.
Then they apply the adhesive and roll the seam.
But here's the detail that most installers get wrong: they don't let the primer and cleaner fully evaporate before applying the adhesive.
The cleaner and primer are solvent-based. They need about 10-15 minutes to evaporate completely. If the adhesive is applied over wet primer, the adhesive's bond is compromised. It traps the solvent, creating a weak layer that will eventually delaminate.
I've cut open EPDM seams that were 3 years old and found the adhesive layer was still soft and tacky—the solvent had never fully evaporated. The seam was still bonded, but it would fail within 5-7 years. I've seen seams that were 7 years old where the adhesive was completely dry but the bond had broken—the solvent had evaporated after the seam was closed, and the adhesive had shrunk and lost its grip.
The reason: Most residential roofers are used to working with asphalt and modified bitumen, where the adhesive is applied and the material is bonded immediately. With EPDM, the primer and adhesive have specific evaporation times. The manufacturer's instructions are clear, but many installers skip the waiting step to save time.
The chemistry behind the detail
Here's the technical explanation for why the waiting step matters—without getting lost in jargon.
EPDM adhesive is a contact cement. It's applied to both surfaces that will be joined. The adhesive contains a solvent that keeps it liquid. When the solvent evaporates, the adhesive becomes tacky. When the two tacky surfaces are brought together, they form a permanent bond.
The primer does two things:
It chemically preps the EPDM surface, opening up the molecular chains so the adhesive can bond.
It extends the working time of the adhesive—giving you a few extra minutes to position the seam before the adhesive sets.
But the primer itself also contains solvents. If those solvents are trapped under the seam, they weaken the adhesive bond. The result is a seam that looks good on the outside but has a weak layer inside.
I've tested this in the field: On two EPDM roofs I installed side-by-side, I cleaned and primed one seam and let it dry for 15 minutes before applying adhesive. The other seam I primed and applied adhesive immediately. The seam with the 15-minute wait had a much stronger bond in the peel test (a test that measures the force required to peel apart a seam). The seam with the immediate adhesive had a lower bond strength by about 40%.
What I've seen in my inspections

I've inspected about 30 EPDM roofs in the Denver area over the last few years. Here's what I've observed:
About 45% had seams that were less than 2.5 inches wide (below minimum).
About 30% had evidence of adhesive failure at the seams—the seam was lifting, or the adhesive had separated.
About 15% had visible moisture infiltration at the seams.
About 10% were installed perfectly, with proper seam width, clean primer, and fully dried adhesive.
The pattern is consistent: the roofs that lasted the longest had seams that were properly prepared, with the full 15-minute drying time for the primer.
The roofs that failed early had seams where the roofer had rushed the process—applying adhesive over wet primer, or applying adhesive without primer at all.
The visible signs of a failing seam
If you have an EPDM roof and want to check your seams, here's what to look for:
Peeling: The seam edge is lifting. You can see daylight through the gap, or you can see the adhesive layer exposed. This is the most obvious sign of seam failure.
Discoloration: A brown or yellow discoloration around the seam indicates that moisture has gotten in. The water is breaking down the adhesive.
Air bubbles: Small bubbles under the seam surface indicate that solvent was trapped. The adhesive bond is compromised, and the seam will fail over time.
Cracking: Fine cracks at the seam edge indicate that the adhesive has failed and the EPDM is beginning to degrade at the edge.
The cost of failure
An EPDM seam that fails costs more to repair than the original installation.
To repair a failing seam, the roofer has to:
Clean and prime the seam edge again
Apply new adhesive
Roll the seam
In most cases, also apply a cover strip (a narrower strip of EPDM that covers the seam)
The cost of repair is about 50-70% of the original installation cost for that seam. If a large seam fails, the repair cost can be as much as 30% of the total roof cost.
Compare that to the cost of doing it right the first time: an extra 15 minutes of labor per seam to let the primer dry.
I've seen roofs where the roofer saved an hour of labor across the whole roof and cost the homeowner $2,000 in seam repairs three years later.
What I tell roofers who install EPDM
If you're a roofer reading this—or if you want to know what I look for when I inspect a roofer's work—here's what I'd tell you:
Read the manufacturer's application instructions. They're clear: primer must be applied, allowed to dry for 10-15 minutes, then adhesive can be applied. This is not optional.
Use a primer that's compatible with your membrane and adhesive. Different EPDM formulations require different primers. If you use the wrong primer, the adhesive will not bond properly.
Check the weather. Primer and adhesive cure differently at different temperatures. At 60-80°F, the 10-15 minute drying time is appropriate. At lower temperatures, you may need to wait longer. At higher temperatures, you may need to work faster.
Don't over-apply adhesive. A thin, even coat is better than a thick, uneven coat. Thick adhesive traps solvent and creates weak points.
Test a sample seam on the job site. Take a small strip of EPDM and test the seam before installing the full roof. If the seam peels apart, the primer or adhesive is not being applied correctly.
What I tell homeowners
If you're considering an EPDM roof, here's what I'd tell you:
Ask the roofer about the seam detail before you sign the contract. A good roofer will know exactly what I'm talking about. A bad roofer will either not know or will give a vague answer. "The manufacturer says to let it dry for 15 minutes, and we always do that" is a green flag.
Check the roofer's references, specifically for EPDM roofs. An EPDM roof is different from an asphalt shingle roof. The roofer should have recent EPDM installations they can show you.
Watch the installation if possible. You don't need to be a roofer to see if the seams are being allowed to dry. The installer will clean the seam, apply primer, then take a break—or move to another part of the roof—before applying the adhesive. If you see the installer apply primer and immediately start applying adhesive, the seam won't last.
Accept the premium. EPDM is more expensive than asphalt shingles, but the life expectancy is significantly longer. Over 25 years, EPDM is often cheaper per year than a budget asphalt shingle roof, once you account for maintenance and replacement.
And finally, inspect the seams once a year. A visual inspection from the roof edge will let you check for peeling or discoloration. If a seam is failing, catch it early. A small repair is cheaper than a big one.
No notes on this sheet yet.