Why I started tracking installs like lab samples
When I worked in the Intertek lab, every test had a control group, a clear protocol, and a fixed endpoint. You mounted the sample, ran the sequence, recorded the failure, and closed the file.
When I became a GC, I realized the field has no control group. Every house is different. Every crew is different. Every window goes into a wall that was framed slightly differently from the last one. If a window leaked, it was almost impossible to isolate why—too many variables changed between jobs.
So I decided to build my own control group.
Starting in early 2021, I identified twelve window replacement projects that I was either consulting on or had a direct line to the installer. I set criteria: all within the Denver metro, all within 50 miles of my shop, all installed between March and October. I excluded projects where the homeowner had done the install themselves. Every window was installed by a licensed crew.
I documented every variable I could:
Brand and product line
Frame material (vinyl, fiberglass, or aluminum-clad wood)
Flashing tape brand and type
Sealant brand and type
Rough opening gap dimensions
Fastener spacing
Window-to-WRB integration detail
Then I took baseline readings—visual inspection of the interior drywall, a quick moisture meter sweep, and a qualitative air-leakage check using a simple smoke pen.
And then I waited.
The three-year check: methodology

At the three-year mark, I went back to all twelve houses. Same equipment: thermal imaging camera, pin-type moisture meter, and a spray wand for localized water testing on exterior corners.
My protocol was consistent:
Interior wall scan with thermal camera (morning, before solar gain) looking for thermal bridging or wet spots.
Moisture meter readings at the four corners of each window on the interior drywall.
Exterior visual inspection for sealant cracks, tape lifting, and fastener rust.
Localized spray test—light water application at the head and sill, just enough to see if water tracked anywhere it shouldn't.
Three of the twelve showed water intrusion. In two cases, the moisture readings were high enough that I recommended immediate flashing repair. In the third, the leak was slow—just a 2% moisture spike in the bottom corner of the drywall—but the thermal image told the story: water was tracking down the stud cavity.
Three leaks out of twelve. That's a 25% failure rate in three years. And every single one of the leaks traced back to two things.
What the three leaking windows had in common
I expected the culprits to be the cheapest windows. They weren't.
I expected the culprit to be the crew that looked the most rushed. They weren't the worst, either.
The three leaking windows came from three different brands, three different installers, and three different house vintages (1978, 1995, and 2006). But they shared two identical installation details that the non-leaking windows did not.
Commonality 1: Flat sills with no positive drainage slope
Every window needs a sill pan or flashing detail that directs water out and away from the building, not down into the framing. In an ideal installation, the sill angle slopes at least 5 to 7 degrees—enough that water doesn't pool against the window frame.
All three of the leaking windows had essentially flat sills. The installation crew had either skipped the shims at the outer edge, or used a pan flashing that was level instead of sloped. The result was that rainwater hitting the sill pooled against the bottom corner of the window frame. Over three years, that pooling water worked its way past the sealant and into the rough opening.
One of the windows had a pan flashing with an integrated back dam—the right product, installed incorrectly. The back dam was caught under the window frame, creating a tiny reverse slope that directed water toward the building, not away from it.
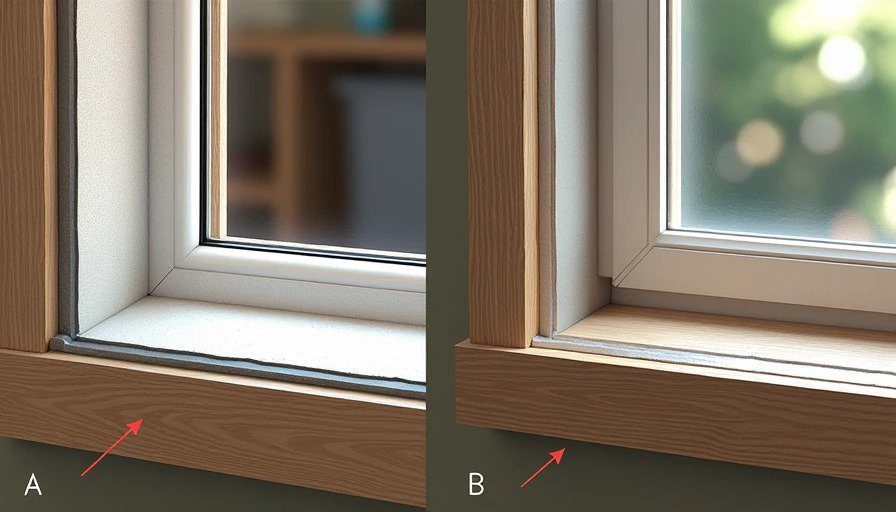
Commonality 2: Tape applied over the window flange with no "shingle" overlap at the corners
This is the subtle one that most DIY videos get wrong, and apparently three professional crews got wrong too.
Window flashing tape is supposed to be applied in a specific sequence: bottom piece first, then the side pieces overlapping the bottom, then the top piece overlapping the sides. This creates a shingle effect—water running down the wall or across the head cascades over the tape, not under it.
All three leaking windows had the tape sequence reversed at one or both bottom corners. In two cases, the side tape was applied first, and the bottom tape was laid over it, creating a seam that funneled water directly into the corner gap. In the third case, the tape at the bottom corner had simply lifted—but when I peeled it back, I found the same reverse-overlap underneath.
Water doesn't flow uphill. Water doesn't flow horizontally through a shingled seam. But water loves a seam that faces the wrong way. And in Colorado, where wind drives rain horizontally against the wall, that backward seam becomes a tiny funnel that pushes water directly into the OSB edge.
What the lab tests didn't tell me

AAMA 502 is the standard for field-testing windows for water penetration. It uses a calibrated spray rack to apply pressurized water to the exterior of an installed window while negative pressure is applied inside.
It's a useful test. It catches gross installation errors—the kind where water pours in during the spray.
But AAMA 502 doesn't test for standing water on a flat sill. It doesn't test for corner capillary action at a reverse-taped seam. And it certainly doesn't test for what happens after three years of freeze-thaw cycling, when the sealant around the frame has taken on a dozen micro-cracks from thermal expansion.
These three windows would have passed an AAMA 502 test on the day they were installed. The water intrusion was slow, subtle, and dependent on weather patterns that weren't present during the test. It took three years of pooled water, freeze-thaw wedging, and wind-driven rain to reveal the failure that the lab test never simulated.
What that means for the other nine
Here's the sobering part: the nine windows that didn't leak? They don't get a clean bill of health.
They were installed with the same general quality level. They face the same weather. They just happen to have slightly better drainage or slightly better tape overlap—or they got lucky with the wind direction during the worst storms.
I tracked twelve installations for three years. Three leaked. That's a 25% failure rate from a group of licensed, professional installations. Extrapolate that across the entire Denver metro, and the number of windows quietly wicking moisture into wall cavities is staggering.
Most of those leaks won't show up on the interior drywall until the OSB has lost enough structural integrity that the window shifts. That's year eight or ten, not year three. At year three, I caught them early. Most homeowners won't.
What I'd tell you if you're installing windows this year
You can't control the weather. You can't perfectly control your installer's tape sequence unless you watch them like a hawk (and I don't recommend hovering over a crew—they'll tense up and make more mistakes). But here's what you can control:
Ask about sill slope before they start. Confirm that the sill pan or flashing detail includes positive drainage—a minimum 5-degree slope away from the house. If the quote doesn't mention a sloped sill pan, ask the GC to add it. It costs pennies compared to the window.
Take photos of the flashing before the window goes in. Even if you're not a GC, you can stand back and snap a picture of the rough opening with tape applied before the unit is inserted. The tape order is visible: you should see the bottom piece, then the side pieces overlapping it, then the top overlapping the sides. If you see the tape overlapping the wrong direction, pause the crew and ask. It's an easy fix before the window covers it.
Pick a window with a sill angle designed for drainage. Not all window frames have an integrated sill slope. Some rely entirely on the installer's pan flashing to shed water. If you're choosing between two comparable windows, choose the one with a built-in slope at the sill. It adds an extra layer of insurance for when—not if—the field installation has a minor flaw.
And finally, understand that the three-year check is the real test. AAMA 502 tells you whether the window survived the installation day. The three-year mark tells you whether it survived the installation plus three winters. That's the data that matters.
What I'm doing differently after this project
I'm changing two things in my own installations as a direct result of this tracking project:
First, I'm specifying pan flashings with an integrated slope, not a flat pan. The extra 3/8-inch height at the inside edge costs almost nothing and gives water a path out.
Second, I'm taking a photo of every taped rough opening before the window goes in. I check the tape sequence at the corners myself—before the crew seals it up. It takes thirty seconds and saves a three-year callback.
Third, I'm offering a three-year check as a standard part of my installation quotes. If a window is going to leak from a minor tape or slope detail, I want to find it at year three, not year ten. It gives me better data, and it gives the homeowner better peace of mind.
Twelve windows. Three leaks. Two causes. One fix.
No notes on this sheet yet.