The house: built 2019, first signs at year three
The house is a 2,800-square-foot custom build in Wheat Ridge, Colorado—west metro Denver, about 10 minutes from my shop. Two-story, hardiePlank siding, 2x6 framing, Tyvek HomeWrap, Pella windows.
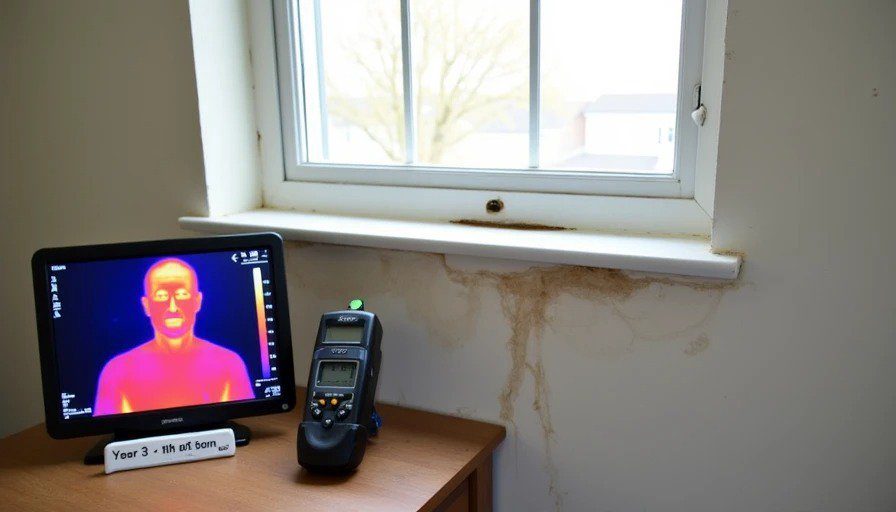
The homeowner called me in spring 2023. They'd noticed a small discoloration on the drywall below a second-floor window on the west-facing wall. No active dripping. No mold growth visible. Just a faint watermark, about 2 inches wide, that appeared after heavy rain.
They'd had the builder back to look at it. Builder checked the exterior, found no obvious damage to the siding or trim, and concluded it must be condensation. The homeowner wasn't convinced. I wasn't either.
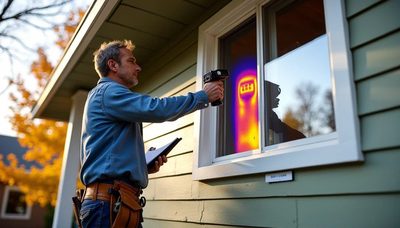
I came in with the thermal camera on a cool morning. The area below the window showed a temperature difference of about 4°F compared to the adjacent wall—not huge, but consistent with moisture wicking. The moisture meter confirmed it: 16% at the base of the stud cavity, compared to 8% in the dry sections.
Sixteen percent is the threshold where wood begins to support mold growth. The wall was wet, and the builder had missed it.
The homeowner approved a full cut-open. I wanted to see everything.
Layer 1: The siding (HardiePlank)
Photo 1: Exterior wall with window removed. Siding is intact, no visible cracks or gaps.
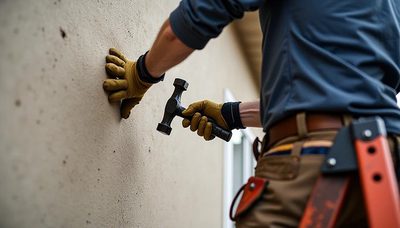
I removed the HardiePlank siding carefully—not to preserve it, but to expose the layers underneath without disturbing the evidence. The siding was intact with no visible cracks, no gaps in the joints, and no loose boards.
What I expected: The HardiePlank itself was not the problem. It's a cementitious product that resists water and holds paint well. The issue was not the siding.
What I found: The siding was intact and properly flashed at the corners. The water wasn't entering through the siding—it was entering at the window, then migrating behind the siding.
Photo 2: HardiePlank removed, exposing Tyvek HomeWrap. Tape still adhered but with a small wrinkle at the bottom corner.
The Tyvek was intact and flexible. The tape at the horizontal seam was still firmly adhered—no evidence of lifting. At the bottom corner, however, I noticed a small wrinkle in the tape, about 2 inches long, where the tape had not been fully rolled.
I noted it, but a wrinkle alone doesn't cause water intrusion. I moved deeper.
Layer 2: The house wrap (Tyvek HomeWrap)
Photo 3: Tyvek peeled back at the window opening, showing the rough opening and the tape sequence at the sill.
This is where the story started to reveal itself.
The Tyvek at the window opening was taped with the manufacturer's recommended tape—the red Tyvek tape. The tape sequence at the sill looked correct: bottom piece first, then side pieces overlapping it. But when I lifted the tape at the bottom, I found a problem.
Photo 4: Close-up of the sill tape, lifted to show the underlying sealant.
The tape had been applied over a bead of sealant at the sill. That's good—it helps seal the tape to the rough opening. But the sealant bead had been applied thick enough that the tape didn't fully adhere. Instead of a tight bond across the entire sill, I found a series of small gaps where the tape had bridged over the sealant, leaving tiny tunnels.
Water had tracked along those tunnels from the window's exterior, moving laterally across the sill, then down the rough opening behind the tape.
Photo 5: Tape peeled back fully, showing the sill plate, the wood framing below, and the discoloration.
The wood at the bottom of the rough opening was stained dark—a clear indication of prolonged moisture exposure. The sill plate had moisture readings at 18%. Not wet enough to feel damp, but wet enough to support mold and eventually rot.
Layer 3: The window opening
Photo 6: Window removed from the opening, showing the installation details from the back side.
I removed the window carefully. The window itself was Pella fiberglass—a quality product. The pan flashing at the bottom was intact and appeared to be sloped correctly.
Photo 7: Pan flashing, removed to show the sill and framing below.
Here I found the root cause.
The pan flashing was a folded metal pan, installed with the back dam and side dams integrated. But it had been installed before the tape sequence—a small but critical error.
The tape should be applied to the rough opening first, then the pan flashing, then the window, then the final tape at the flanges. In this installation, the pan flashing had been placed directly over the rough opening, and the tape had been applied over the pan flashing—meaning the tape was bonding to the metal, not to the framing.
Photo 8: Close-up of the pan flashing edge, showing water staining behind the metal.
Water had tracked down the window flange, hit the pan flashing, and pooled at the corner. Because the tape was applied over the metal, it had no path to the framing—it was stuck to the metal, and the water was trapped behind it.
That trapped water eventually found its way into the framing at the corner of the opening. It traveled through the sill plate and down the stud, creating the watermark on the drywall below.
Photo 9: Stud at the bottom corner, showing the water staining.
The water staining extended from the corner about 2 inches along the sill and 3 inches down the stud. The wood was beginning to show early signs of discoloration and surface softening. At year three, the damage was limited. Had it gone another two years unchecked, the repair would have required replacing the sill plate and the bottom portion of the stud.
Layer 4: The sheathing
Photo 10: OSB sheathing beneath the window, showing the tape and the back-dam detail.
The OSB behind the pan flashing was dry but had a slight darkening at the edge where the water had traced. The tape at the back-dam had held, but the water had followed the edge of the metal down into the gap between the pan flashing and the sill.
Photo 11: Cutaway of the sill, showing the sealant gap that allowed water to track.
What I found at the sill was a gap between the pan flashing and the wood—about a 1/8-inch void where the sealant hadn't filled the corner completely. Water had tracked along the gap, bypassing the pan flashing entirely, and had entered the wall cavity.
This was not an installation error. This was a design limitation of the pan flashing itself. The pan didn't have a fully welded corner—it was folded, and the fold had a small gap at the corner. In the lab, that gap is irrelevant because the sealant fills it. In the field, the sealant can be applied inconsistently, and the gap can become a capillary wick.
The wall sheathing was clean—no rot, no visible mold. But the framing had taken on enough moisture to cause the drywall staining below.
The sequence of failure

After examining every layer, here's the sequence of what went wrong:
Pan flashing installed before tape. The pan was placed directly on the rough opening. The tape was applied over the metal, not bonded to the framing.
Tape adhered to metal, not wood. Because the tape was stuck to the metal pan flashing, it couldn't seal the joint between the pan and the framing. That joint remained open—a capillary path for water.
Water tracked from the window flange down the pan. When rain hit the window flange, water ran down the exterior of the window and collected at the sill. The pan was sloped, but the water found the gap at the corner.
Water entered the framing through the sealant gap. The gap at the corner—where the pan flashing folded—wasn't fully sealed. Water tracked into that gap and moved down into the rough opening.
Water wicked through the sill plate and down the stud. Once in the rough opening, water was absorbed by the wood. It tracked laterally along the sill and down the stud, eventually showing up as moisture on the interior drywall.
What went right: The tape at the seam, the back-dam, the proper overlap, the integral pan flashing, and the sloped sill. All of these were correct.
What went wrong: One detail—the order of installation of the tape relative to the pan flashing.
Why this matters for your house
This wall passed the builder's final inspection. It had no visible exterior issues. It only showed signs of a problem at year three—and even then, the drywall just had a faint watermark.
If I hadn't cut it open, the homeowner would have assumed it was just cosmetic condensation. By year five, the sill plate would have been soft enough to push a screwdriver through. By year eight, the drywall would have started crumbling.
The failure was one installation detail—the tape sequence—and one design detail—the folded pan flashing with a gap at the corner. The builder used a quality pan flashing. The installer followed the instructions. But the instructions didn't specify the tape sequence relative to the pan, and the pan manufacturer's corner detail relied on sealant to fill a gap that could have been eliminated with a welded corner.
What I changed in my own specs after this teardown
This teardown confirmed something I'd suspected for a while: pan flashing corners are the weak point of most window installations.
I now specify two changes in my own projects:
First: The pan flashing is installed after the tape, not before. The tape goes on the rough opening first, then the pan flashing, then the window. This ensures the tape bonds to the framing, not to the metal, and provides a continuous seal around the pan-to-framing joint.
Second: All pan flashings must have welded or sealed corners—no folded gaps. If the manufacturer's pan has a gap at the corner, I require a bead of sealant to fill it, applied before installation, and a verification check before the window is set.
The extra cost is negligible. The benefit is avoiding a tear-out like this one.
The annotated breakdown

Here's the full layer-by-layer summary from the teardown, with what each layer revealed:
Layer | Condition | Evidence |
|---|---|---|
Siding (HardiePlank) | Intact | No cracks, gaps, or loose boards |
House wrap (Tyvek HomeWrap) | Mostly intact, one wrinkle at corner | Tape held, but small wrinkle at bottom edge |
Window pan flashing | Intact but folded corner | Gaps at the folded edge where sealant didn't fill |
Tape at rough opening | Applied over pan, not under it | Tape bonded to metal, not wood; gap beneath |
Sill plate | Moisture present, 18% reading | Discoloration; soft surface at corner |
Stud | Moisture present, 16% at base | Water staining extending down 3 inches |
OSB sheathing | Dry | Clean, no staining or damage |
Interior drywall | Faint watermark below window | Moisture had wicking to the interior surface |
What I'd do differently if it were my house
If this had been my house, here's what I'd have done differently at the time of construction:
I'd have taken a photo of the tape sequence before the window went in. That photo would have shown the tape applied over the pan flashing, not under it. I'd have caught it before the window covered it.
I'd have checked the pan flashing corners for sealant. A quick visual inspection of the pan before installation would have shown the gap at the folded corner. I'd have added sealant on the spot.
I'd have done a thermal scan at year two. The first sign of moisture at the drywall is the last chance to catch the failure early. At year three, the sill plate was already discolored. At year two, it would have been dry enough to repair with a simple flashing adjustment. At year three, the framing needed a partial replacement.
What the homeowner did next
After the teardown and diagnosis, we replaced the sill plate—a 16-inch section at the corner—and the bottom 4 inches of the stud. We re-flashed the entire opening with a new pan, welded corners, and a clear tape sequence.
The new pan was installed over the tape, then the window was set, and the exterior tape was applied. We removed the wrinkle in the Tyvek and re-taped the seam.
Total repair cost: about $2,200.
The alternative—doing nothing—would have resulted in full rot of the sill plate and stud by year eight, requiring a larger tear-out and reframing of the entire opening. Estimated cost: $6,000 to $8,000.
The homeowner caught it early. The teardown was preventive, not remedial.
The takeaway
This teardown is not about a bad window, a bad contractor, or a bad product. It's about one detail in the installation that got missed, and a design limitation in the pan flashing that allowed water to find its way in.
The wall performed well for three years. It would have performed for another two. But by year five, the rot would have been visible. By year eight, it would have required a major repair.
If you're building or remodeling, understand that every layer matters. The siding is not the waterproof layer. The wrap is not the waterproof layer. The window is not the waterproof layer. The continuous, well-installed flashing at the opening is the waterproof layer—and it's the layer that most often fails.
Take photos. Check the details. And if you see a faint watermark below a window, don't wait.

No notes on this sheet yet.